Are you ready to elevate your painting projects to the next level? If you’re looking for a solution that ensures a flawless finish and enhances the longevity of your paint job, then you’ve come to the right place. Bin undercoat is a powerful tool in the world of DIY and professional painting alike. This guide will walk you through everything you need to know about using bin undercoat effectively, so you’ll achieve stunning results every time. Whether you’re dealing with tricky stains, uneven surfaces, or simply aiming for that perfect top coat, mastering bin undercoat can be a game changer. Let’s dive into this comprehensive journey together!
Understanding Bin Undercoat
Bin undercoat is a specialized primer designed to tackle challenging surfaces and enhance paint adhesion. Unlike standard primers, it contains unique properties that allow it to seal stains effectively.
This product is especially beneficial when working with wood, drywall, or surfaces previously covered in glossy finishes. Its formulation helps prevent bleed-through from water stains, smoke damage, or tannin-rich woods.
Another key feature of bin undercoat is its fast-drying nature. This allows for quicker project turnaround times without sacrificing quality.
Additionally, the versatility of bin undercoat makes it suitable for both interior and exterior applications. Whether you’re refreshing your living room walls or tackling outdoor furniture, this primer can adapt to various environments seamlessly.
Understanding these characteristics will empower you to make informed choices during your next painting endeavor.
Benefits of Using Bin Undercoat
Using bin undercoat offers a range of benefits that can significantly enhance your painting projects. One of the primary advantages is its excellent adhesion properties. This means your topcoat will stick better, leading to a more durable finish.
Bin undercoat also excels at hiding imperfections on surfaces. Whether you’re working with old wood, drywall repairs, or stained areas, it creates a smooth base for an even application.
Additionally, this product is effective in blocking stains and odors. If you’re dealing with water damage or smoke residue, bin undercoat seals those issues away before applying color.
Another noteworthy benefit is its fast-drying formula. This allows for quicker project completion without sacrificing quality. You can apply multiple coats within a short period, making it ideal for any timeline-driven task.
It’s versatile enough for various applications—from furniture refinishing to wall treatments—catering to both DIY enthusiasts and professional painters alike.
Types of Surfaces Suitable for Bin Undercoat
Bin undercoat is versatile and can be used on various surfaces. It excels on drywall, ensuring a smooth finish for your topcoat.
Wooden surfaces are also ideal candidates. The undercoat helps seal the wood, providing excellent adhesion for paint while preventing stains from bleeding through.
In kitchens and bathrooms, bin undercoat performs wonderfully on previously painted walls or cabinets. Its ability to block odors makes it a smart choice in these high-moisture areas.
For metal surfaces, this product offers protection against rust and corrosion when primed correctly. It ensures longevity and durability of the final coat.
Concrete walls benefit as well; using bin undercoat enhances paint adherence while sealing porous materials effectively.
When tackling challenging projects like vinyl or laminate, bin undercoat provides that crucial grip needed for successful results.
Step-by-Step Guide to Using Bin Undercoat
Begin by preparing your surface. Ensure it’s clean, dry, and free from dust or grease. This will help the undercoat adhere properly.
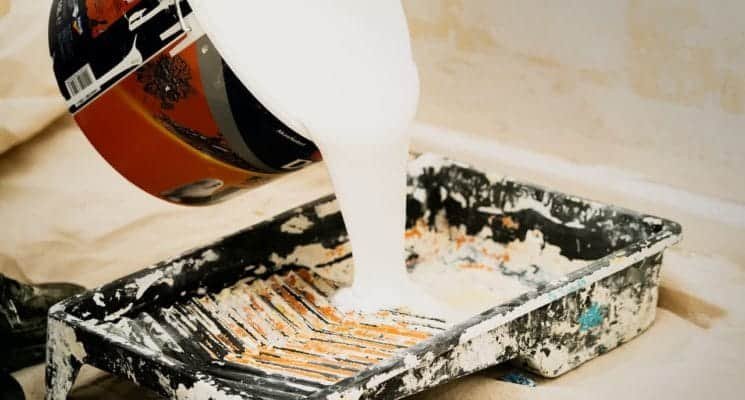
Next, gather your tools. A high-quality brush or roller works best for application. Having a paint tray handy can also make this process smoother.
Now, pour the bin undercoat into your tray and start applying it evenly across the surface. Use long strokes to cover larger areas while ensuring you don’t leave any gaps.
Pay attention to edges and corners; a smaller brush might be needed for those tricky spots. Don’t rush—allow each coat to dry fully as per manufacturer instructions before moving on to additional layers if necessary.
After you’re satisfied with the coverage, clean up any spills immediately using water or appropriate solvents. The workspace should remain tidy throughout this step for optimal results later on.
Common Mistakes to Avoid When Using Bin Undercoat
Using bin undercoat can transform your painting project, but a few missteps can hinder your results.
One common mistake is skipping surface preparation. Clean the area thoroughly before applying the undercoat to ensure better adhesion and finish.
Another error is applying too thick a layer. Thin layers dry faster and create a smoother base for subsequent coats. Patience pays off here.
Many people forget to check drying times between applications. Rushing this step can compromise the integrity of your paint job.
Not considering temperature and humidity levels might lead to uneven drying or poor adherence as well.
Neglecting safety precautions while handling bin undercoat is a serious oversight. Always wear gloves and work in a well-ventilated space to avoid harmful inhalation or skin contact.
Tips for Achieving the Best Results with Bin Undercoat
To achieve the best results with bin undercoat, preparation is key. Start by thoroughly cleaning the surface to remove dust, dirt, and grease. This ensures better adhesion.
Next, consider using a primer before applying bin undercoat on porous surfaces. It creates an even base and enhances coverage.
When applying the product, use high-quality brushes or rollers designed for smooth application. Avoid overloading your tools to prevent drips and uneven layers.
Work in thin coats rather than one thick layer. This allows for quicker drying times and reduces the risk of peeling later on.
Allow adequate drying time between coats as specified by the manufacturer. Patience during this phase can significantly impact your final finish quality.
Alternatives to Bin Undercoat
When considering alternatives to Bin undercoat, there are several options available. One popular choice is a latex-based primer. This type of primer offers excellent adhesion and can be used on various surfaces, making it versatile for most projects.
Another alternative is oil-based primers. These products are especially effective when sealing stains and odors in wood or drywall surfaces. They tend to provide superior coverage but may require longer drying times.
For those looking into eco-friendly solutions, water-based primers have gained popularity. They offer low VOCs while still delivering good performance across different applications.
Shellac primers can also serve as an option for specific situations, particularly where fast drying and stain blocking are required. Each alternative has its strengths depending on your project needs.
Conclusion
Using Bin undercoat can significantly enhance your painting projects, whether you’re refreshing an old space or tackling a new one. Understanding its unique properties and benefits allows you to make informed decisions about when and how to use it effectively. With the right preparation and application techniques, along with awareness of common pitfalls, you’ll achieve professional-looking results.
By exploring alternatives when necessary, you can choose the best product for your specific project needs. Armed with this comprehensive guide, you’re well-equipped to maximize the potential of Bin undercoat in all your painting endeavors. Happy decorating!