Are you tired of dealing with oversized images that slow down your website or clutter your storage? Look no further! Microsoft Photos offers a hidden gem known as Image Resize Legacy. This tool allows you to effortlessly shrink those hefty files without losing quality. Whether you’re preparing photos for a project, sharing them online, or simply freeing up space on your device, mastering this feature can make all the difference. Ready to dive in and discover how this powerful yet easy-to-use function can simplify your digital life? Let’s get started!
Benefits of Using Image Resize Legacy in Microsoft Photos
Using Image Resize Legacy in Microsoft Photos offers several advantages for users looking to manage their images effectively.
First, it simplifies the resizing process. You can quickly adjust image dimensions without needing advanced software or technical skills.
Another benefit is its batch processing feature. This allows you to resize multiple images at once, saving considerable time and effort.
The tool maintains quality during resizing, ensuring your photos remain sharp and clear even after adjustments.
Moreover, it’s integrated within Microsoft Photos, making it easily accessible alongside your other photo management tools.
This seamless integration means less switching between applications, creating a smoother workflow for users who regularly edit their pictures.
Step-by-Step Guide on How to Use Image Resize Legacy
To use Image Resize Legacy in Microsoft Photos, start by launching the app. Open the image you want to resize from your library.
Next, look for the “…” menu in the top right corner of the screen. Click on it to reveal a dropdown list of options.
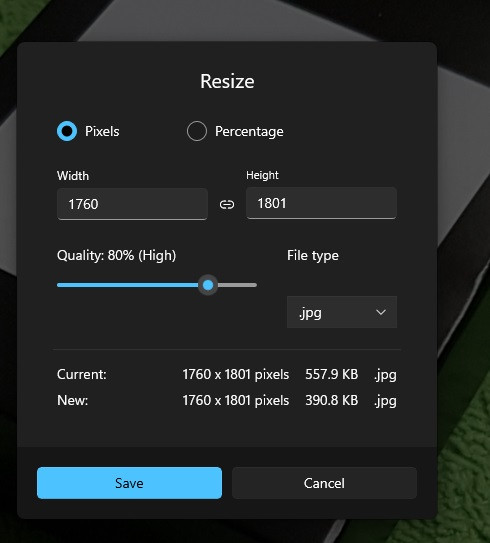
Select “Resize” and choose “Image Resize Legacy.” You’ll be prompted with various size options like Small, Medium, Large, or Custom. Pick one that suits your needs.
If you select Custom, input your desired dimensions in pixels. Don’t forget to maintain aspect ratio if required.
Once everything is set up as per your preferences, hit “Save As” to ensure you’re not overwriting the original file. This way, you’ll keep both versions intact for future use.
Just like that, you’ve resized an image effortlessly!
Tips and Tricks for Best Results
To get the best results with Image Resize Legacy, keep your original files. Always work on a copy to preserve quality.
Consider the dimensions you need before resizing. Different platforms have specific requirements. Knowing this can save time and ensure your images look great online.
Adjust image quality settings wisely. Higher resolutions are ideal for printing, while lower ones work well for web use. Balance clarity with file size to optimize loading times.
Experiment with different formats too. JPEG is often preferred for photos due to its compression capabilities, while PNG is better for images that require transparency or crisp edges.
Don’t rush through the process. Take your time reviewing each resized image to ensure it meets your standards before saving them permanently.
Common Issues with Image Resize Legacy and How to Solve Them
When using Image Resize Legacy, users may encounter some common issues. One frequent problem is the application not launching correctly. This can usually be resolved by restarting your computer or ensuring that Microsoft Photos is updated to the latest version.
Another issue arises with image quality after resizing. If pictures appear pixelated or blurry, check the resolution settings before saving your resized images. Selecting a higher output resolution can help maintain clarity.
Some users might also find it challenging to navigate through various options. Taking a moment to explore each feature can enhance familiarity and ease of use.
If you face compatibility problems with certain file formats, converting the images beforehand might solve this issue efficiently. Using software like Paint or an online converter ensures smooth usage in Image Resize Legacy without any hiccups.
Alternatives to Image Resize Legacy in Microsoft Photos
If Image Resize Legacy doesn’t meet your needs, there are several alternatives worth exploring.
One popular option is Adobe Photoshop Express. This tool offers robust editing features, including resizing images with precision and ease.
GIMP is another solid choice for those looking for free software. It provides extensive capabilities similar to professional-grade applications without the cost.
For quick adjustments online, websites like Pixlr or Canva can be very handy. They allow users to resize images directly in their browsers, making it convenient when you’re on the go.
If you prefer mobile solutions, consider apps like Snapseed or Photo Resizer Pro. Both offer intuitive interfaces designed for easy image management on smartphones.
These alternatives give you flexibility and options that may better suit your workflow or specific requirements when resizing images.
Conclusion: Why You Should Give Image Resize Legacy a Try
Image Resize Legacy is a powerful tool that can enhance your image editing experience. Its simplicity and efficiency make it a go-to option for anyone looking to adjust their images quickly. Whether you are a casual user or someone who works with graphics regularly, this feature offers the flexibility needed for various projects.
It allows you to maintain quality while resizing images, making it perfect for web use or social media sharing. Plus, the interface is user-friendly, which means less time learning how to navigate the software and more time creating stunning visuals.
If you haven’t tried Image Resize Legacy yet, now might be the perfect time. It could save you valuable hours in your workflow while delivering impressive results. With its range of benefits and ease of use, it’s worth considering adding this tool to your digital arsenal.