Your roof is one of the most important components of any structure. It serves as the primary barrier between your property and the elements, providing protection, insulation, and aesthetic value. Despite its importance, the process of roof installation is often misunderstood or underestimated by homeowners and even some property developers.
A properly installed roof is more than just a layer of shingles or metal—it’s a complex system of components that work together to safeguard your home, maintain energy efficiency, and ensure structural integrity. Whether you’re building a new home, replacing an old roof, or upgrading materials, understanding the full scope of the roof installation process will help you make better decisions and avoid costly errors.
This comprehensive guide walks you through everything you need to know before, during, and after a roof installation.
Why Roof Installation Is More Than Just Roofing
When people think of roofing, they often picture shingles being nailed to wood decking. But roof installation involves many layers and steps that ensure the roof performs as intended. A well-executed installation is critical to the safety and performance of your entire building.
Here’s what a quality roof installation entails:
- Correct structural framing
- Waterproof underlayment
- Proper flashing and ventilation
- High-quality fasteners and materials
- Professional workmanship
Cutting corners or skipping steps during installation can lead to moisture intrusion, heat loss, structural rot, and premature failure—issues that are both costly and dangerous.
Choosing the Right Roofing System
Your choice of roofing system will significantly impact the longevity, performance, and cost of the installation. There are several roofing types available, each with its own advantages and limitations.
1. Asphalt Shingles
Pros: Affordable, easy to install, widely available
Cons: Shorter lifespan (15–30 years), susceptible to weather damage
2. Metal Roofing
Pros: Extremely durable (up to 70 years), energy-efficient, recyclable
Cons: Higher upfront cost, can be noisy during rain
3. Clay or Concrete Tile
Pros: Long-lasting (up to 100 years), fire-resistant, ideal for hot climates
Cons: Very heavy, requires reinforced support, expensive
4. Slate
Pros: Elegant appearance, lifespan over 100 years
Cons: Expensive, fragile, very heavy
5. Wood Shakes
Pros: Natural look, excellent insulation
Cons: Requires maintenance, flammable without treatment
The right material depends on your aesthetic preferences, climate, budget, and the structural support of your home. Always consult with an experienced roofing professional before selecting your materials to ensure compatibility with your structure and performance expectations.
Preparing for a Roof Installation
Preparation is key to a smooth, efficient, and successful installation process. Here’s what to expect:
Inspection and Assessment
Before the project begins, the roofing contractor should conduct a detailed inspection of your existing roof (for replacements) or structure (for new builds). This includes evaluating the condition of the decking, identifying any structural damage, and ensuring proper slope and drainage.
Cost Estimation and Planning
You’ll receive a written estimate detailing material costs, labor, disposal fees, and other charges. Make sure to clarify what is and isn’t included. Transparent communication at this stage prevents confusion and disputes later.
Permits and Regulations
Depending on local codes and the scale of your project, building permits may be required. A professional contractor will usually handle the paperwork, ensuring your project complies with all relevant standards and regulations.
The Roof Installation Process: Step by Step
Let’s take a closer look at what actually happens during a professional roof installation:
Step 1: Tear-Off (for Replacements)
If you’re replacing an existing roof, the first step is tearing off the old materials down to the decking. This allows for a clear inspection of the underlying structure.
Step 2: Deck Inspection and Repair
The deck (usually plywood or OSB) must be in excellent condition to support the new roof. Any rot, water damage, or soft spots are repaired or replaced.
Step 3: Underlayment Installation
A waterproof barrier (typically made from synthetic materials or felt) is installed over the deck. This serves as your first line of defense against water infiltration.
Step 4: Flashing and Drip Edges
Metal flashing is installed around chimneys, valleys, and vents to prevent leaks. Drip edges are placed along the eaves to direct water into gutters and away from your home’s foundation.
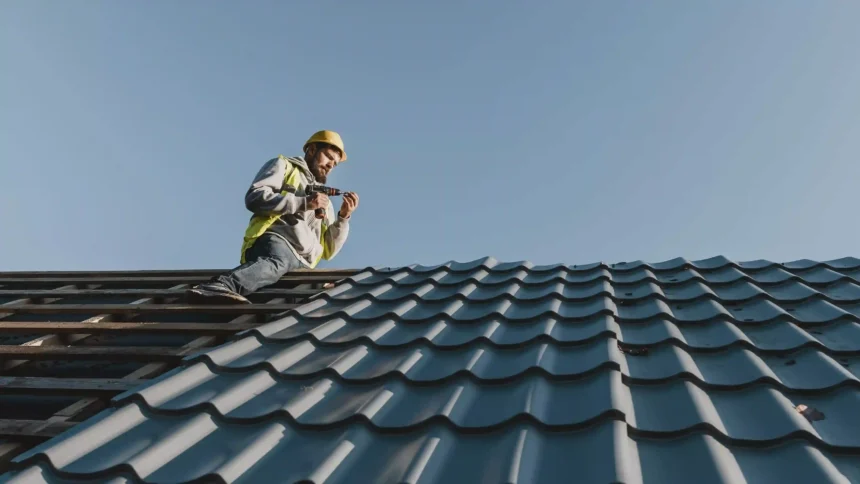
Step 5: Roofing Material Installation
Whether it’s shingles, metal panels, tiles, or slate, this is when your chosen roofing material is carefully installed following precise patterns and overlap requirements to prevent leaks and improve durability.
Step 6: Ventilation System
Proper attic ventilation prevents moisture buildup and helps regulate indoor temperature. Ridge vents, soffit vents, or powered exhaust fans may be added to the roof system.
Step 7: Clean-Up and Final Inspection
Once the installation is complete, all debris and waste materials are removed from the site. A thorough inspection ensures everything was installed correctly, and your warranty can be registered.
Common Mistakes to Avoid During Roof Installation
Even with professional help, there are several mistakes that can compromise your roofing system if not properly addressed:
- Improper flashing installation around vents and chimneys
- Insufficient attic ventilation, leading to moisture buildup
- Low-quality materials used to cut costs
- Inadequate fasteners or incorrect spacing between nails
- Neglecting the underlayment, which is crucial for waterproofing
Being aware of these issues helps ensure your contractor follows best practices throughout the process.
What to Expect After Roof Installation
Once your new roof is in place, your responsibility shifts to long-term maintenance. Even the best roofs require occasional upkeep to stay in peak condition.
Routine Maintenance Tips
- Inspect twice a year, especially after major storms
- Clean gutters to ensure proper drainage
- Check for moss or algae, which can damage shingles
- Ensure flashing and seals remain intact around skylights and chimneys
- Look inside your attic for signs of leaks or moisture
Warranties and Insurance
Make sure you understand the warranty provided with your roof installation. Most systems include:
- Manufacturer’s warranty: Covers defects in roofing materials
- Workmanship warranty: Covers errors in installation, usually from the contractor
Also, update your homeowner’s insurance to reflect the value and replacement cost of your new roof.
Energy Efficiency and Modern Roofing
Today’s roofing systems go far beyond aesthetics and protection. Many modern roofing materials come with energy-saving benefits that help reduce your utility bills.
- Cool roofing technologies reflect solar heat and reduce air conditioning needs
- Proper ventilation minimizes temperature fluctuations inside the home
- Insulated roofing systems improve thermal performance and reduce energy waste
These features not only save money but also contribute to a more sustainable and environmentally friendly home.
Final Thoughts
A professional roof installation is one of the most valuable investments you can make in your property. It offers protection, increases energy efficiency, enhances curb appeal, and raises your home’s market value.
Whether you’re dealing with a replacement, a brand-new construction, or an upgrade to a more efficient roofing system, the success of your project depends on informed decisions and expert execution. Always work with certified professionals, choose high-quality materials, and never compromise on workmanship.
With the right planning and attention to detail, your roof can provide decades of reliable service—and peace of mind.