Introduction
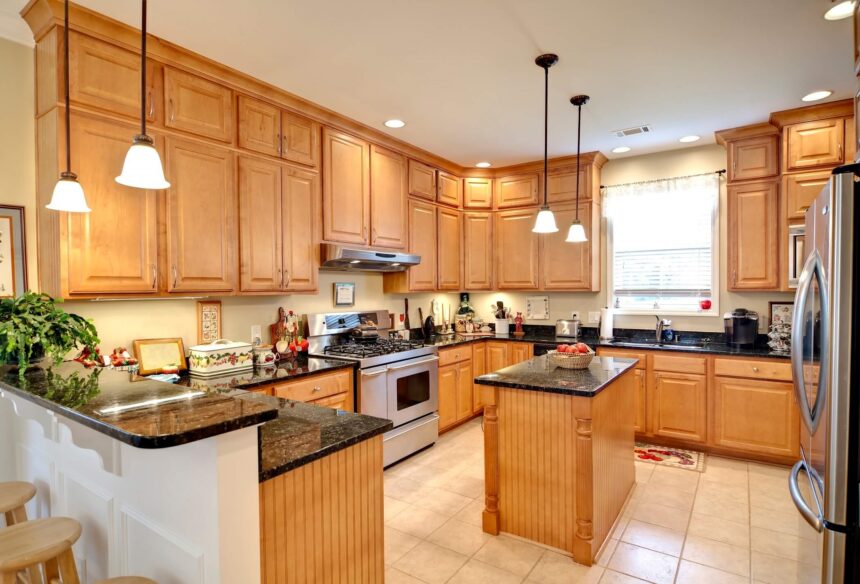
Does your cabinetry feel tired, outdated, or simply uninspiring? Rather than replacing your cabinets—a costly and labor-intensive endeavor—cabinet painting offers a fresh, budget-friendly makeover that can completely transform your space. In this article, we’ll explore everything you need to know: from planning and preparation to techniques, tools, paint choices, design ideas, maintenance tips, and the pros and cons. Whether you’re a DIY enthusiast or just curious about how to refresh your interiors, this comprehensive guide will help you achieve beautiful results.
Why Choose Cabinet Painting?
Refreshing cabinets with paint is a smart choice for several reasons:
- Cost-effectiveness: Replacing cabinetry involves high materials and labor costs. Painting is a fraction of the expense and still delivers a major visual upgrade.
- Design flexibility: You can choose virtually any color or finish—matte, satin, semi‑gloss, high‑gloss—to match your aesthetic.
- Minimal disruption: Painting can often be done in phases (e.g., cabinet doors first), reducing downtime in your living space.
- Sustainability: By refreshing what you already have, you reduce waste and give your existing cabinetry a longer lifespan.
Getting Started: Planning Your Cabinet Painting Project
Before diving into paint and brushes, consider these essential planning steps:
1. Assess Cabinet Condition and Material
Start by examining your cabinets. Are they solid wood, plywood with veneer, laminate, or MDF (medium-density fiberboard)? Surface type affects prep work and paint adhesion:
- Solid wood: Typically the easiest to sand and paint.
- Laminate or melamine: Requires special primers and possibly light sanding to ensure adhesion.
- Enamel or factory-coated surfaces: May need bonding primer.
Look for damage—peeling veneer, chips, deep scratches—and decide if minor repairs are needed first.
2. Decide Which Parts to Paint
You might paint just the door fronts and drawer faces, or include the frames, sides, interiors, or open shelving. Popular choices include:
- Full cabinet frames for a uniform, built-in look.
- Contrasting elements, such as a different-color island vs. perimeter cabinets, for visual interest.
At this stage, determine whether painting will be a full tear-out (off-site) job or done in place, one piece at a time.
3. Choose Your Color and Finish
Paint color transforms the feel of a room:
- Light neutrals (white, cream, gray) keep the vibe airy and open.
- Bold hues (navy, forest green, charcoal) add drama and depth.
- Two-tone looks: e.g., light above, darker below; or island painted differently.
Finish choices:
- High-gloss: Sleek and shiny; highly durable and easy to clean.
- Semi-gloss/satin: A good all-purpose choice—pretty and practical.
- Matte/eggshell: Subtle and modern, but more prone to scratches and harder to clean.
Preparation: Foundation for a Beautiful Finish
Success hinges on thorough prep, so don’t rush through this stage.
1. Remove Cabinet Doors and Hardware
Label each door/drawer and its matching hardware carefully. Use a numbering or lettering system so reassembly goes smoothly.
2. Clean Thoroughly
Kitchen countertops and cabinetry can collect grease and grime. Clean surfaces using a degreaser or TSP (trisodium phosphate) solution. This step ensures paint will adhere properly.
3. Sanding and Surface Scuffing
Light sanding—using 120–220 grit—creates a slightly rough surface for the primer to grip. For slick, previously-painted surfaces, liquid might be a faster alternative than sanding.
4. Fill and Repair
Patch holes, dents, and seams with wood filler or appropriate putty. Sand smooth once dry. Caulk gaps between frames and walls if needed.
5. Prime Everything
Primer is the workhorse that ensures uniform coverage and adhesion. Choose:
- High-quality bonding primer (especially for laminate, melamine, or slick surfaces).
- Stain-blocking primer if dealing with knots, tannins, or bold previous colors.
- Water-based primer for fast drying and low odor; oil-based for durability in high-moisture areas.
Apply 1–2 thin, even coats; let the primer cure before sanding lightly to knock down any raised grain or brush marks.
Painting Techniques and Tools
With prep complete, here’s how to get a flawless painted finish.
1. Select Your Tools
- Brushes: High-quality angled sash brushes (2.5–3″) for frames and trim.
- Rollers: Microfiber or high-density foam rollers (4–6″) for flat surfaces.
- Spray systems: HVLP or airless sprayers deliver ultra-smooth finishes but require more masking and equipment.
A combination of brush and roller (often called “cutting in” with a brush followed by rolling) gives a professional DIY result.
2. Apply Thin, Even Coats
Light coats dry faster and resist drips. Apply paint in the direction of the grain or along the length of door panels. Let each coat dry completely (follow paint label drying times). Lightly sand between coats (with 220 grit) for silky smooth touch.
Three coats often yield the best coverage and durability, especially with lighter colors or over dark primers.
3. Drying and Curing Time
Let cabinets dry in a dust-free, ventilated area. Most paints feel dry to the touch in a few hours but may take several days to fully cure—during this time, be gentle with the surfaces.
Design Options to Personalize Your Finish
1. Two-Tone Cabinetry
Paint uppers a light neutral and lowers a darker shade to add vertical interest. Or choose a vibrant island hue against subtle surroundings.
2. Accent Details
Consider painting inner cabinet boxes or open shelving in a complementary pop for a playful reveal behind glass doors.
3. Hardware Play
Upgrading to new knobs or pulls can enhance your new paint color. Brass and matte black hardware are particularly popular for modern kitchens, but vintage or ornate styles add charm too.
4. Painted Accents and Trim
Use your cabinet paint to tie in with other room elements: floating shelves, window trim, or built-in nooks.
Step‑by‑Step Process Overview
- Plan colors and finish.
- Remove doors, label hardware.
- Clean thoroughly.
- Sand or degloss surfaces.
- Repair damage, fill holes.
- Prime each component evenly.
- Sand lightly between coats.
- Paint with thin coats—brush and roller, or spray.
- Let’s cure it fully.
- Reassemble and enjoy your revamped space.
Common Challenges and Troubleshooting
- Drips or runs: Caused by overloading brush/roller. Brush out thin coats, and sand smooth once cured.
- Peeling or poor adhesion: Often due to inadequate surface prep or skipping primer.
- Visible brush marks: Use a high-density foam roller after brushing; sanding between coats helps too.
- Mismatched sheen: Always paint all parts (doors, frames, edges) in the same sheen to ensure visual consistency.
- Dust inclusion: Paint in a clean space; wipe surfaces with tack cloth before painting.
Maintenance and Longevity
To keep your refreshed cabinetry looking great:
- Wipe regularly with a damp microfiber cloth.
- Avoid abrasive cleaners—even gentle dish soap is often sufficient.
- Touch up nicks with a small artist’s brush and leftover paint.
- Expect lasting results for several years if prep, paint, and finish were properly executed.
When to Call in Professionals
Some situations justify hiring pros:
- Spray paint application in large kitchens.
- Complex cabinetry details or crown molding.
- Lack of time or comfort with mess and tools.
- Need for fast turnaround or minimal disruption.
Many painting contractors offer cabinet-specific services, prepping, priming, spraying, and re-installing for a turnkey result.
Sustainability and Environmental Considerations
Opting to paint rather than replace is a sustainable choice:
- Reduces waste by reusing existing cabinetry.
- Low-VOC or zero-VOC paints minimize indoor air pollution.
- Longer cabinet lifespan conserves resources.
When selecting paints, check for environmental certifications (e.g., GreenGuard, AQMD compliance).
Final Thoughts
Whether you’re refreshing a kitchen, bathroom, laundry, or built-in storage, cabinet painting in Arapahoe County is one of the most impactful, budget-friendly ways to elevate your interiors. With thoughtful planning, careful prep, and attention to detail—especially in priming, color selection, and application—you can achieve beautiful, durable results that refresh your space for years to come.
From choosing between matte or gloss, coordinating two-tone designs, to maintaining and touching up your work, this guide equips you with the knowledge to confidently tackle a cabinet makeover. May your space feel revitalized, your paintbrush steady, and your environment inspired.