Are you looking to streamline your network organization? If so, patch panels might be the solution you’ve been searching for. These handy devices can significantly improve cable management and connectivity in both home and office environments. With a variety of options available, understanding how to install and maintain patch panels is essential for anyone wanting to optimize their networking setup. Whether you’re a seasoned IT professional or just starting out on your tech journey, mastering the art of patch panel management will enhance functionality while keeping everything tidy. Let’s dive into this complete guide that will take you from novice to pro in no time!
What is a Patch Panel?
A patch panel is a centralized hub for managing network connections. Think of it as the control center for your cables, where they can be organized and rerouted easily.
Typically mounted on a rack or wall, this device houses multiple ports. Each port corresponds to a cable that connects various devices like computers, servers, and switches.
Patch panels simplify complex wiring setups by allowing you to connect and disconnect cables without hassle. This makes troubleshooting much easier because you can identify issues quickly without sifting through tangled wires.
The flexibility offered by patch panels also allows for easy upgrades or changes in your network configuration. Instead of rewiring everything when adding new equipment, you just make adjustments at the panel level.
Types of Patch Panels
Patch panels come in various types, each serving unique needs. One of the most common is the Ethernet patch panel. Ideal for networking, it allows multiple connections to be organized efficiently.
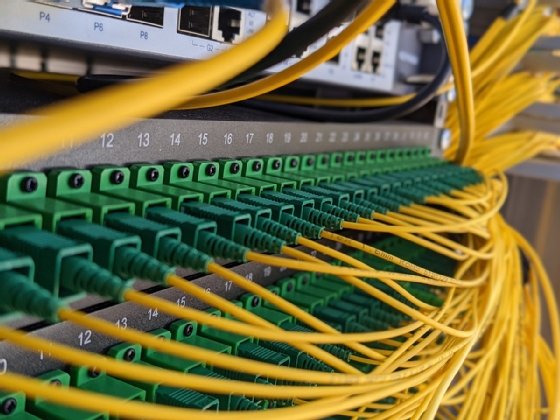
Fiber optic patch panels are another option. They manage fiber connections and help maintain signal integrity over long distances. These are crucial for high-speed internet services.
For audio and video applications, there are specialized patch panels designed to handle different formats like HDMI or XLR. These ensure seamless integration of audiovisual equipment.
Modular patch panels offer flexibility with removable ports that accommodate future expansion or changes. This adaptability makes them popular in dynamic environments where technology evolves rapidly.
Choosing the right type depends on your specific requirements, ensuring optimal performance and organization within your setup.
Benefits of Using a Patch Panel
A patch panel serves as a central hub for managing network connections. It simplifies the process of organizing cables and devices, making troubleshooting much easier.
By using patch panels, you can create a more structured cabling system. This organization reduces clutter and enhances airflow in server rooms, promoting better equipment performance.
Another significant benefit is scalability. As your network grows, adding or changing connections becomes a breeze without needing to rewire everything. Just plug into the appropriate port on the patch panel.
Patch panels also enhance flexibility. You can easily switch out equipment or change configurations without disrupting your entire network setup.
Additionally, they provide clear labeling options that help technicians identify connections quickly. This clarity saves valuable time during maintenance and upgrades.
Tools and Materials Needed for Installation
When installing patch panels, having the right tools and materials is crucial. Start with a good quality cable cutter. This tool ensures clean cuts for both copper and fiber optic cables.
Next, you’ll need a punch-down tool. It’s essential for connecting wires to the terminals on the patch panel securely. A wire stripper will also come in handy to prepare your cables by removing insulation without damaging them.
Don’t forget about mounting hardware. Most patch panels require screws or brackets for installation within an equipment rack or wall mount.
A label maker can be invaluable too, allowing you to clearly identify each connection point as you go along.
Gather some Ethernet cables of varying lengths based on your layout needs. Having these materials prepared beforehand makes the entire process smoother and more efficient.
Step-by-Step Guide to Installing a Patch Panel
Start by selecting the right location for your patch panel. Choose a spot that provides easy access and is close to your networking equipment.
Next, gather all necessary tools. You’ll need a drill, screwdriver, cable ties, and of course, the patch panel itself.
Now it’s time to mount the panel on the wall or rack. Use screws suitable for your installation surface. Make sure it’s level before tightening everything down.
Once mounted, begin terminating cables. Strip about an inch off each cable end and insert them into their designated slots on the patch panel according to color codes.
After securing all cables, tidy up with cable ties to maintain order in your setup. Connect short Ethernet cables from the ports on your patch panel to switches or routers as needed for network functionality.
Tips for Managing and Maintaining Patch Panels
Regularly label all cables connected to your patch panel. This simple step can save you time during troubleshooting or reconfiguration. Clear labeling makes it easier for anyone working on the network.
Ensure proper cable management by using Velcro ties or cable organizers. Neatly arranged cables not only look professional but also improve airflow, reducing heat buildup and extending equipment life.
Periodically inspect your patch panels for any signs of wear or damage. Look out for loose connections and frayed wires that could disrupt performance.
Keep documentation up-to-date with diagrams showing how each connection is configured. This will be invaluable when changes are needed in the future.
Maintain a clean workspace around your patch panel. Dust accumulation can hinder performance and cause overheating issues over time. Regular cleaning ensures everything operates smoothly and efficiently.
Troubleshooting Common Issues
When managing patch panels, you might encounter a few common issues. One of the most frequent problems is connectivity failure. If devices aren’t communicating as expected, check cable connections first. Sometimes cables can become loose or disconnected.
Another issue could be signal degradation. This often stems from poor-quality cables or excessive length. Ensure your cables meet industry standards and are not longer than necessary.
Labeling confusion can also arise with multiple ports in use. A well-organized labeling system helps identify each connection quickly, preventing frustration during troubleshooting.
Overheating components may cause performance drops. Make sure there’s adequate airflow around your patch panel to avoid this problem.
By addressing these common concerns promptly, you maintain an efficient network environment without significant downtime.
Conclusion
Understanding patch panels is essential for anyone looking to improve their network infrastructure. These devices provide a streamlined way to manage connections between various network components, minimizing clutter and enhancing organization.
The different types of patch panels cater to specific needs. Whether you choose a standard or modular panel, each has unique benefits that can suit your project requirements. Utilizing these tools comes with multiple advantages—from easier troubleshooting to improved signal integrity.
Installation may seem daunting at first, but with the right tools and a clear step-by-step guide, anyone can tackle this task successfully. Proper management and maintenance ensure longevity and efficient performance of your setup.
While challenges can arise during operation, knowing how to troubleshoot common issues will save time and reduce frustration.
By investing in quality patch panels and following best practices for installation and upkeep, you set the stage for an organized, efficient networking environment that meets both current demands and future expansions.


