A wall mount range hood keeps your kitchen clean and safe. It removes smoke, grease, and cooking odors from the air while you cook. This guide explains everything you need to know about these important kitchen appliances.
What Is a Wall Mount Range Hood?
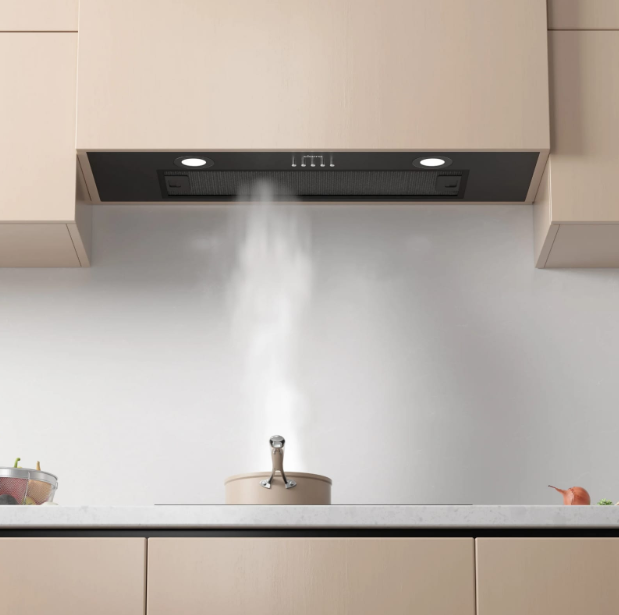
A wall mount range hood attaches directly to the wall above your stove or cooktop. The unit sits between your cooking surface and your cabinets or extends to your ceiling with a chimney design.
These hoods pull air up from your cooking area. They filter or vent this air outside your home. This process removes smoke, steam, grease particles, and cooking smells.
Wall mount hoods work best when your stove sits against a wall. They offer more power and style options than under-cabinet models.
How Wall Mount Range Hoods Work
Your range hood uses a fan or blower motor to pull air upward. This air passes through filters that trap grease and large particles.
After filtering, the hood either:
- Vents the air outside through ductwork (ducted models)
- Cleans the air with charcoal filters and returns it to your kitchen (ductless models)
The fan speed controls how much air moves through the system. Higher speeds pull more air but make more noise.
Ducted vs Ductless Range Hoods
Ducted Range Hoods
Ducted hoods connect to pipes that send air outside your home. They work like a chimney for your kitchen.
Benefits:
- Remove all smoke, steam, and odors from your home
- More effective at clearing the air
- Usually quieter because the motor can sit outside
- Don’t need filter replacements as often
Drawbacks:
- Cost more to install
- Need ductwork running through your walls or ceiling
- Cannot install in every kitchen location
- Require professional installation
Ductless Range Hoods
Ductless hoods filter air and send it back into your kitchen. They don’t need any pipes or ducts.
Benefits:
- Easier and cheaper to install
- Work in any kitchen layout
- No holes needed in your walls
- Can be a DIY project
- Use less energy
Drawbacks:
- Don’t remove humidity or heat
- Need regular filter changes (every 6-12 months)
- Less effective at removing odors
- Not ideal for heavy cooking
Understanding CFM: How Much Power You Need
CFM stands for Cubic Feet per Minute. This number tells you how much air your hood can move.
Higher CFM means better ventilation. But you don’t always need the highest number. Too much power wastes energy and creates extra noise.
How to Calculate CFM for Electric Stoves
Measure your cooktop width in feet. Multiply by 100.
Example: A 30-inch cooktop is 2.5 feet wide. 2.5 x 100 = 250 CFM minimum
How to Calculate CFM for Gas Stoves
Gas stoves need more ventilation because they produce more heat.
Add up all the BTU ratings from your burners. Divide by 100.
Example: Your stove has four burners.
- Burner 1: 10,000 BTU
- Burner 2: 10,000 BTU
- Burner 3: 5,000 BTU
- Burner 4: 15,000 BTU
- Total: 40,000 BTU
40,000 ÷ 100 = 400 CFM minimum
Kitchen Size Matters
Your range hood should refresh your kitchen air 15 times per hour.
Calculate your kitchen volume: Length x Width x Height = Cubic feet
Divide by 4 to get your CFM need.
Example: Kitchen is 12 feet x 15 feet x 10 feet 12 x 15 x 10 = 1,800 cubic feet 1,800 ÷ 4 = 450 CFM
Use the highest number from all your calculations. This ensures proper ventilation.
CFM Guidelines by Cooking Style
Light cooking (200-300 CFM):
- Cook a few times per week
- Mostly boiling and baking
- Small electric cooktop
Medium cooking (300-600 CFM):
- Daily cooking
- Frequent frying or sautéing
- Standard 30-inch stove
- Family meals
Heavy cooking (600+ CFM):
- Cook multiple meals daily
- All burners running often
- High-heat cooking
- Large cooktop (36 inches or wider)
- Professional-style ranges
Important Features to Consider
Size and Width
Your range hood should match or exceed your cooktop width. A hood that’s too small won’t capture all the smoke and steam.
Standard sizes:
- 24 inches
- 30 inches (most common)
- 36 inches
- 42 inches
- 48 inches
Add 3 inches on each side of your cooktop for best results. A 30-inch stove works well with a 36-inch hood.
Mounting Height
Install your hood 24 to 30 inches above a gas range. Electric ranges can be 28 to 36 inches.
Too low: You might hit your head. The hood gets in your way. Too high: The hood can’t capture smoke effectively.
Filter Types
Mesh Filters:
- Made from aluminum layers
- Trap grease and particles
- Clean in the dishwasher
- Need cleaning monthly
- Last for years
Baffle Filters:
- Made from stainless steel or aluminum
- Better airflow
- Easier to clean
- Used in commercial kitchens
- More effective at catching grease
Charcoal Filters (ductless only):
- Remove odors
- Must be replaced every 3-6 months
- Cannot be cleaned
- Cost $15-30 per filter
Noise Levels
Range hood noise is measured in sones.
- 1-2 sones: Very quiet (like a refrigerator)
- 3-4 sones: Moderate (normal conversation)
- 5-7 sones: Loud (difficult to talk)
- 8+ sones: Very loud (annoying)
Look for hoods with 3 sones or less on the highest setting.
Lighting
Most range hoods include lights above your cooktop.
LED lights:
- Use less energy
- Last longer
- Brighter
- Don’t produce heat
Some models let you adjust brightness and color temperature.
Speed Controls
Multiple speed settings give you control.
- Low speed: Light cooking, simmering
- Medium speed: Most daily cooking
- High speed: Heavy frying, multiple burners
3-4 speed options work well for most people.
Materials and Finishes
Stainless Steel:
- Most popular choice
- Matches most appliances
- Easy to clean
- Durable
- Shows fingerprints
Black Stainless:
- Modern look
- Hides fingerprints better
- Resistant to smudges
Glass:
- Contemporary design
- Easy to wipe clean
- Can be tempered for safety
- Available in black or white
Copper:
- Unique appearance
- Develops patina over time
- Higher cost
- Requires special care
Installation Considerations
Ducted Hood Installation
Professional installation costs $300-1,000 or more.
Steps include:
- Mounting the hood to wall studs
- Cutting holes for ductwork
- Running ducts to an exterior wall or roof
- Connecting electrical wiring
- Sealing all connections
Ductless Hood Installation
DIY installation takes 1-2 hours.
You need:
- Drill
- Level
- Screwdriver
- Stud finder
- Measuring tape
Steps:
- Mark wall for mounting brackets
- Secure brackets to wall studs
- Hang the hood
- Plug in or wire the unit
- Install filters
Electrical Requirements
Most range hoods use standard 120-volt outlets. Check your model’s requirements before installation.
If your hood needs hardwiring, hire an electrician. This ensures safety and meets building codes.
Ductwork Tips
Use the shortest, straightest path possible. Each foot of ductwork and each bend reduces efficiency.
Duct size matters:
- 6-inch ducts: Good for up to 400 CFM
- 8-inch ducts: Needed for 600+ CFM
Smooth, rigid metal ducts work better than flexible ducts.
Building Codes
Some areas require makeup air systems when CFM exceeds 400. This brings fresh air into your home to replace the air being vented out.
Check local codes before buying a high-CFM hood. Requirements vary by location.
Maintenance and Care
Regular Cleaning
Exterior:
- Wipe down after each use
- Use mild soap and water
- Dry with a soft cloth
- Clean stainless steel with grain direction
Filters:
- Remove and clean monthly
- Soak in hot, soapy water
- Use degreaser for stubborn buildup
- Run through dishwasher if safe
- Dry completely before reinstalling
Charcoal Filters (ductless):
- Replace every 3-6 months
- Cannot be cleaned
- Needed for odor control
Long-Term Care
Check ductwork yearly for blockages. Remove any grease buildup.
Test your fan speed regularly. Reduced airflow means it’s time to clean.
Replace light bulbs as needed. LED bulbs last 10+ years.
Inspect mounting brackets yearly. Tighten any loose screws.
Common Problems and Solutions
Hood Won’t Turn On
- Check the power connection
- Test the circuit breaker
- Replace the control board if needed
Weak Suction
- Clean or replace filters
- Check for duct blockages
- Verify proper installation height
- Ensure adequate CFM for your needs
Too Noisy
- Clean dirty filters
- Tighten loose parts
- Check fan blades for damage
- Consider a model with lower sone rating
Odors Not Removed
- Replace charcoal filters (ductless)
- Check for proper venting (ducted)
- Increase fan speed
- Ensure adequate CFM
Lights Not Working
- Replace bulbs
- Check electrical connection
- Test light switch
Cost Breakdown
Range Hood Prices
Budget ($100-300):
- Basic designs
- 200-400 CFM
- Limited features
- Ductless options
- Simple controls
Mid-Range ($300-800):
- Better build quality
- 400-600 CFM
- Multiple speeds
- LED lighting
- Stainless steel finish
- Dishwasher-safe filters
Premium ($800-2,000+):
- Professional-grade
- 600-1,200+ CFM
- Quiet operation
- Designer finishes
- Touch controls
- Auto-shutoff timers
- Heat sensors
Installation Costs
- DIY ductless: $0-50 (tools and supplies)
- Professional ductless: $150-300
- Professional ducted: $300-1,000+
- Ductwork modification: $500-2,000
Operating Costs
- Electricity: $2-5 per month
- Filter replacements: $30-60 per year (ductless)
- Maintenance: Minimal for ducted
Wall Mount vs Other Range Hood Types
Under-Cabinet Range Hoods
Mount underneath your upper cabinets.
Better for:
- Small kitchens
- Limited budgets
- Keeping cabinet space
- Simple installation
Wall mount is better when:
- You need more power
- Style is important
- Cabinet space isn’t needed
- You have a larger cooktop
Island Range Hoods
Hang from the ceiling above island cooktops.
Choose island when:
- Your cooktop is on an island
- You have no nearby walls
Wall mount is better when:
- Cooktop is against a wall
- Lower installation cost
- More placement options
Downdraft Vents
Rise from behind the cooktop when in use.
Choose downdraft when:
- You want an unobstructed view
- Overhead hood won’t work
- Modern, minimal design preferred
Wall mount is better when:
- Need better ventilation
- Traditional setup
- More effective smoke capture
Shopping Tips
Before You Buy
- Measure your cooktop width
- Calculate your CFM needs
- Check your kitchen layout
- Decide between ducted and ductless
- Set your budget
- Consider noise levels
- Think about style and finish
What to Look For
Must-Have Features:
- Adequate CFM for your needs
- Quality filters
- Good lighting
- Multiple fan speeds
- Easy-to-clean surfaces
Nice-to-Have Features:
- Timer function
- Auto-shutoff
- Heat sensors
- Remote control
- Indicator lights for filter changes
- Variable lighting
Questions to Ask
- What’s the maximum CFM?
- How many sones at high speed?
- Is it ducted, ductless, or convertible?
- What filter type does it use?
- How often do filters need replacing?
- Does it include a warranty?
- Are replacement parts available?
Red Flags to Avoid
- No CFM rating listed
- Very low CFM for your stove size
- No filter information
- Extremely cheap price
- No warranty
- Poor reviews about durability
- Flimsy construction
Style and Design Options
Chimney Style
The classic wall mount look. A wide hood with a chimney that extends to your ceiling.
Best for:
- Traditional kitchens
- High ceilings
- Making a statement
- Hiding ductwork
Glass and Stainless Combination
Modern design with glass panels and stainless steel body.
Best for:
- Contemporary kitchens
- Sleek appearance
- Easy cleaning
- Showing off style
Professional Style
Heavy-duty appearance with commercial features.
Best for:
- Serious home cooks
- High-BTU ranges
- Restaurant-style kitchens
- Maximum power needed
Curved Glass
Rounded glass front panel.
Best for:
- Softer look
- Modern style
- Unique design
- Easier cleaning
Angular/Geometric
Sharp lines and modern angles.
Best for:
- Contemporary design
- Bold statements
- Architectural interest
- Modern appliances
Top Considerations for Different Cooktops
Electric Cooktops
Need less CFM than gas stoves. 250-400 CFM works for most home cooks.
Consider:
- Lower initial cost
- Ductless options work well
- Focus on style
- Moderate power needs
Gas Ranges
Require more ventilation due to combustion byproducts.
Consider:
- Higher CFM (400-600+)
- Ducted installation preferred
- Better filtration
- Larger hood recommended
Induction Cooktops
Produce less heat and fewer fumes.
Consider:
- Similar CFM to electric
- Any style works
- Focus on lighting
- Moderate power sufficient
Professional Ranges
High-BTU burners need serious ventilation.
Consider:
- 600-1,200+ CFM
- Must use ducted system
- Professional-grade hood
- May need makeup air system
Energy Efficiency
Choosing Efficient Models
Look for:
- LED lighting
- Variable speed controls
- Energy Star certification (when available)
- Proper sizing (oversized hoods waste energy)
Reducing Energy Use
- Run hood only when cooking
- Use lowest effective speed
- Turn off when not needed
- Keep filters clean
- Seal duct connections well
Long-Term Savings
Higher quality hoods last 10-15 years or more. Spending more upfront often saves money over time through:
- Better durability
- Lower energy use
- Less frequent repairs
- Higher resale value
Safety Considerations
Fire Prevention
Range hoods reduce fire risk by removing grease from the air. Clean filters regularly to maintain this protection.
Never use your stove without the hood running. Grease buildup creates fire hazards.
Air Quality
Proper ventilation protects your health. Cooking produces:
- Carbon monoxide (gas stoves)
- Nitrogen dioxide
- Particulate matter
- VOCs (volatile organic compounds)
A good range hood removes these pollutants.
Installation Safety
- Ensure proper grounding
- Use correct wiring
- Mount securely to studs
- Follow all manufacturer instructions
- Hire professionals when needed
Final Thoughts
A wall mount range hood improves your cooking experience and protects your health. The right hood removes smoke, grease, and odors while adding style to your kitchen.
Choose based on:
- Your cooktop type and size
- How often and what you cook
- Your kitchen layout
- Your budget
- Desired features
Don’t skip the range hood. It’s not just about comfort. It’s about safety and air quality in your home.
Calculate your CFM needs correctly. Buy a hood with enough power for your cooking style. Install it at the right height. Clean it regularly.
A quality range hood is an investment in your kitchen and your family’s health. Choose wisely, install properly, and maintain it well. Your kitchen will stay cleaner, safer, and more comfortable for years to come.