Getting a decent passport photo shouldn’t feel like an obstacle course — yet somehow, it still does. You line up at a booth, pay too much for a few identical shots, and still end up with one that barely looks like you. Try doing it at home, and a different problem appears: the rules. White background or light gray? 2×2 inches or 35×45 mm? Miss one small detail, and your photo’s rejected.
For something that simple, the process is absurdly time-consuming. In reality, making a passport size photo that meets official standards shouldn’t require fancy gear or editing tricks. With today’s AI tools, a basic selfie can turn into a compliant, studio-ready image — all from your phone.
This guide shows how an online ID Photo Maker can make the process smoother, faster, and frankly less painful — whether you’re renewing a passport, updating a student ID, or applying for a visa.
What Counts as a Real Passport Size Photo (and How to Get It Right)
Before you hit print, it helps to know what “passport size” really means. It’s not just about cropping a square picture. A proper passport size photo follows a checklist of visual standards so that scanners and embassies can identify you instantly. The tricky bit is that every country tweaks those rules.
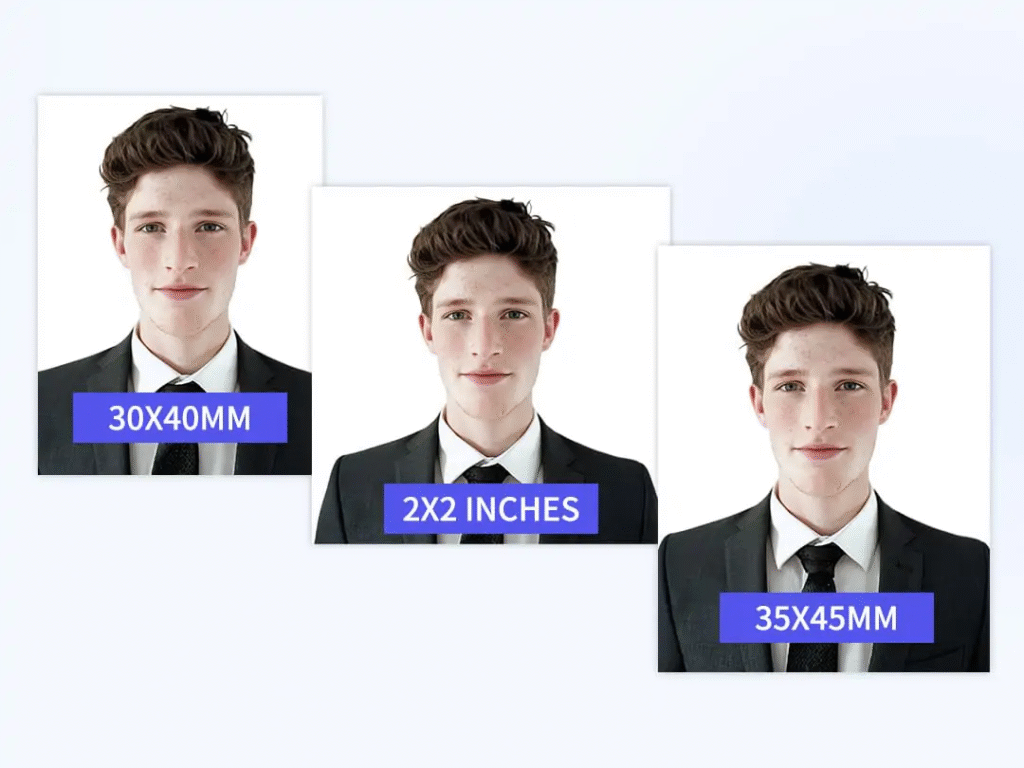
In the U.S., for instance, the standard is 2×2 inches on a white background, with your head taking up roughly 70–80 percent of the frame. The U.K. uses 35×45 mm, usually with softer lighting and stricter symmetry. India and China often want a light-blue background for visas. The idea is consistency: clear lighting, neutral expression, and no filters or shadows.
And that’s where most do-it-yourself photos fall apart. The lighting looks fine on your phone but harsh in print. The background isn’t quite clean. A slight tilt throws off the crop. Even small flaws — glare on glasses or uneven tone — can lead to rejection.
Rather than memorizing all the measurements, let software do the hard math. AI editors like Pokecut can detect your face, crop to the correct ratio, and tidy the background to match common passport or ID standards in many countries. All you really need is decent light and a straight-on shot. Once you grasp that, the process feels less like guessing and more like control.
Why Most DIY Fixes Miss the Mark
If you’ve ever tried to design your own passport photo, you’ve probably felt the frustration. You crop by hand, Google a few templates, and hope for the best. It looks fine on screen, but the printed version tells another story: the proportions are off, the lighting feels wrong, or there’s a faint texture behind you that shouldn’t be there.
That’s the usual DIY trap — relying on instinct instead of standards. Passport photos aren’t about style; they’re about precision. A few millimeters too much headroom, a blurred outline from compression, and automated systems flag it instantly.
Most photo apps don’t help either. They’re built for aesthetics: smoothing skin, brightening tones, chasing the “perfect” look. Great for Instagram, not for an embassy form. You can’t guess your way into compliance.
This is where AI tools genuinely help. Instead of making you memorize every rule, they apply them automatically. Pokecut, for example, recognizes the face, centers it, adjusts proportions based on preset templates, and removes distractions in seconds. It keeps the photo looking natural while aligning it to official specifications. The smarter move isn’t working harder — it’s letting the software handle the tiny details that trip us up.
How an Online ID Photo Maker Works
Here’s what actually happens behind the scenes. A modern ID Photo Maker such as Pokecut takes care of most of the technical work — you just guide the steps and confirm the result.
Step 1 – Take a Clear Photo
Stand in front of a plain wall with soft light. Keep your expression neutral. No filters, no flash.
Step 2 – Upload It
Drop the image into Pokecut’s online editor. The AI spots your face right away. You can try it without even signing up for most features.
Step 3 – Automatic Cropping
The tool resizes and centers your face automatically, matching passport or ID proportions.
Step 4 – Tweak the Background
Need a white background for passports or blue for a visa? Pick a color; the AI removes shadows and cleans the edges.
Step 5 – Download in High Quality
Once you’re happy, export the file in full resolution — no watermark, no compression, ready to print or upload.
The whole process usually takes less time than ordering coffee. Fast, predictable, and surprisingly reliable — because the software already understands what “official” should look like.
When It Actually Helps
You don’t have to be tech-savvy to notice the difference. The real magic is how seamlessly it fits into daily life.
For Travelers: Passport and Visa Photos Without the Wait
You’re renewing a passport or applying for a visa. Instead of queuing up, you snap a photo at home, upload it, choose a size template for your destination, and you’re done in minutes. No reshoots, no guessing.
For Everyday IDs: Student Cards, Work Badges, and More
Need a new student card or work badge? Same steps: snap, upload, download. It’s the simplest way to keep your official photos consistent without touching complex tools.
Small tasks like these eat up time precisely because they seem small. Automation flips that — giving you control and saving hours. It’s not about replacing photo studios; it’s about giving anyone access to the same precision instantly and affordably.
Quick Pre-Submit Check
Before you send it off, pause for half a minute. A quick scan can save a week of waiting.
- Size & Background: correct dimensions and solid color.
- Lighting: no glare, no dark shadows.
- Expression: neutral, eyes open, head straight.
- Quality: sharp, no filters, no pixel blur.
If something feels off, reopen it in Pokecut’s ID Photo Maker and adjust — the AI keeps proportions locked so you’re never starting from scratch. Think of it as your “peace-of-mind pass” before submission.
Why This DIY + AI Combo Works
Passport photos aren’t creative projects; they’re technical ones. That’s why automation fits so well. It doesn’t replace you — it removes the repetitive bits that cause rejections.
With Pokecut, you control the photo and expression; the AI refines the precision — background, brightness, alignment, ratio. The result is a photo that feels like you but meets the standards that matter.
What used to be a small yet stressful errand becomes routine. You save money, avoid queues, and can retake shots until you actually like them. The best part? You stop wondering if the picture will pass. You can trust that it checks the usual boxes — clear, compliant, and uniquely yours.
Once you’ve tried this method, it’s hard to imagine going back to the old booth-and-hope approach.